Prerequisites
Before you start with this tutorial, make sure you have the following tool installed on your machine:- Latest Node.js version
- An Ethereum wallet such as Metamask or Rainbow
Setting up Next.js App
First, create a directory for the project and then initialize a Next.js app using the following command in your terminal:While creating a Next.js application, you will be prompted if you would want to use Tailwind. In this tutorial, we will be using Tailwind, so make sure to set up a Next.js app with Tailwind.Once the project is created successfully, run the following command to install a few other dependencies.
Setting up Clients
In this tutorial, we will be using different packages and SDKs which means we have to set up the context and clients for each of them. Let’s start with RainbowKit and WAGMIRainbowKit and WAGMI
For this tutorial, we will be using Rainbow Kit and WAGMI to handle authentication such as connecting the wallet and signing message. First, inside of_app.js import the following from Rainbow and WAGMI.
RainbowKitProvider and WagmiConfig
Livepeer
Livepeer is a decentralized video infrastructure protocol that allows users to upload, transcode, and serve video content. The Livepeer React SDK provides a set of ready-to-use hooks that make it easy to integrate Livepeer into a project. To get started, navigate to https://livepeer.studio/register and create a new account on Livepeer Studio. This will give you access to your Livepeer dashboard, where you can manage your account and access your API keys. Once you have created an account, in the dashboard, click on the Developers on the sidebar.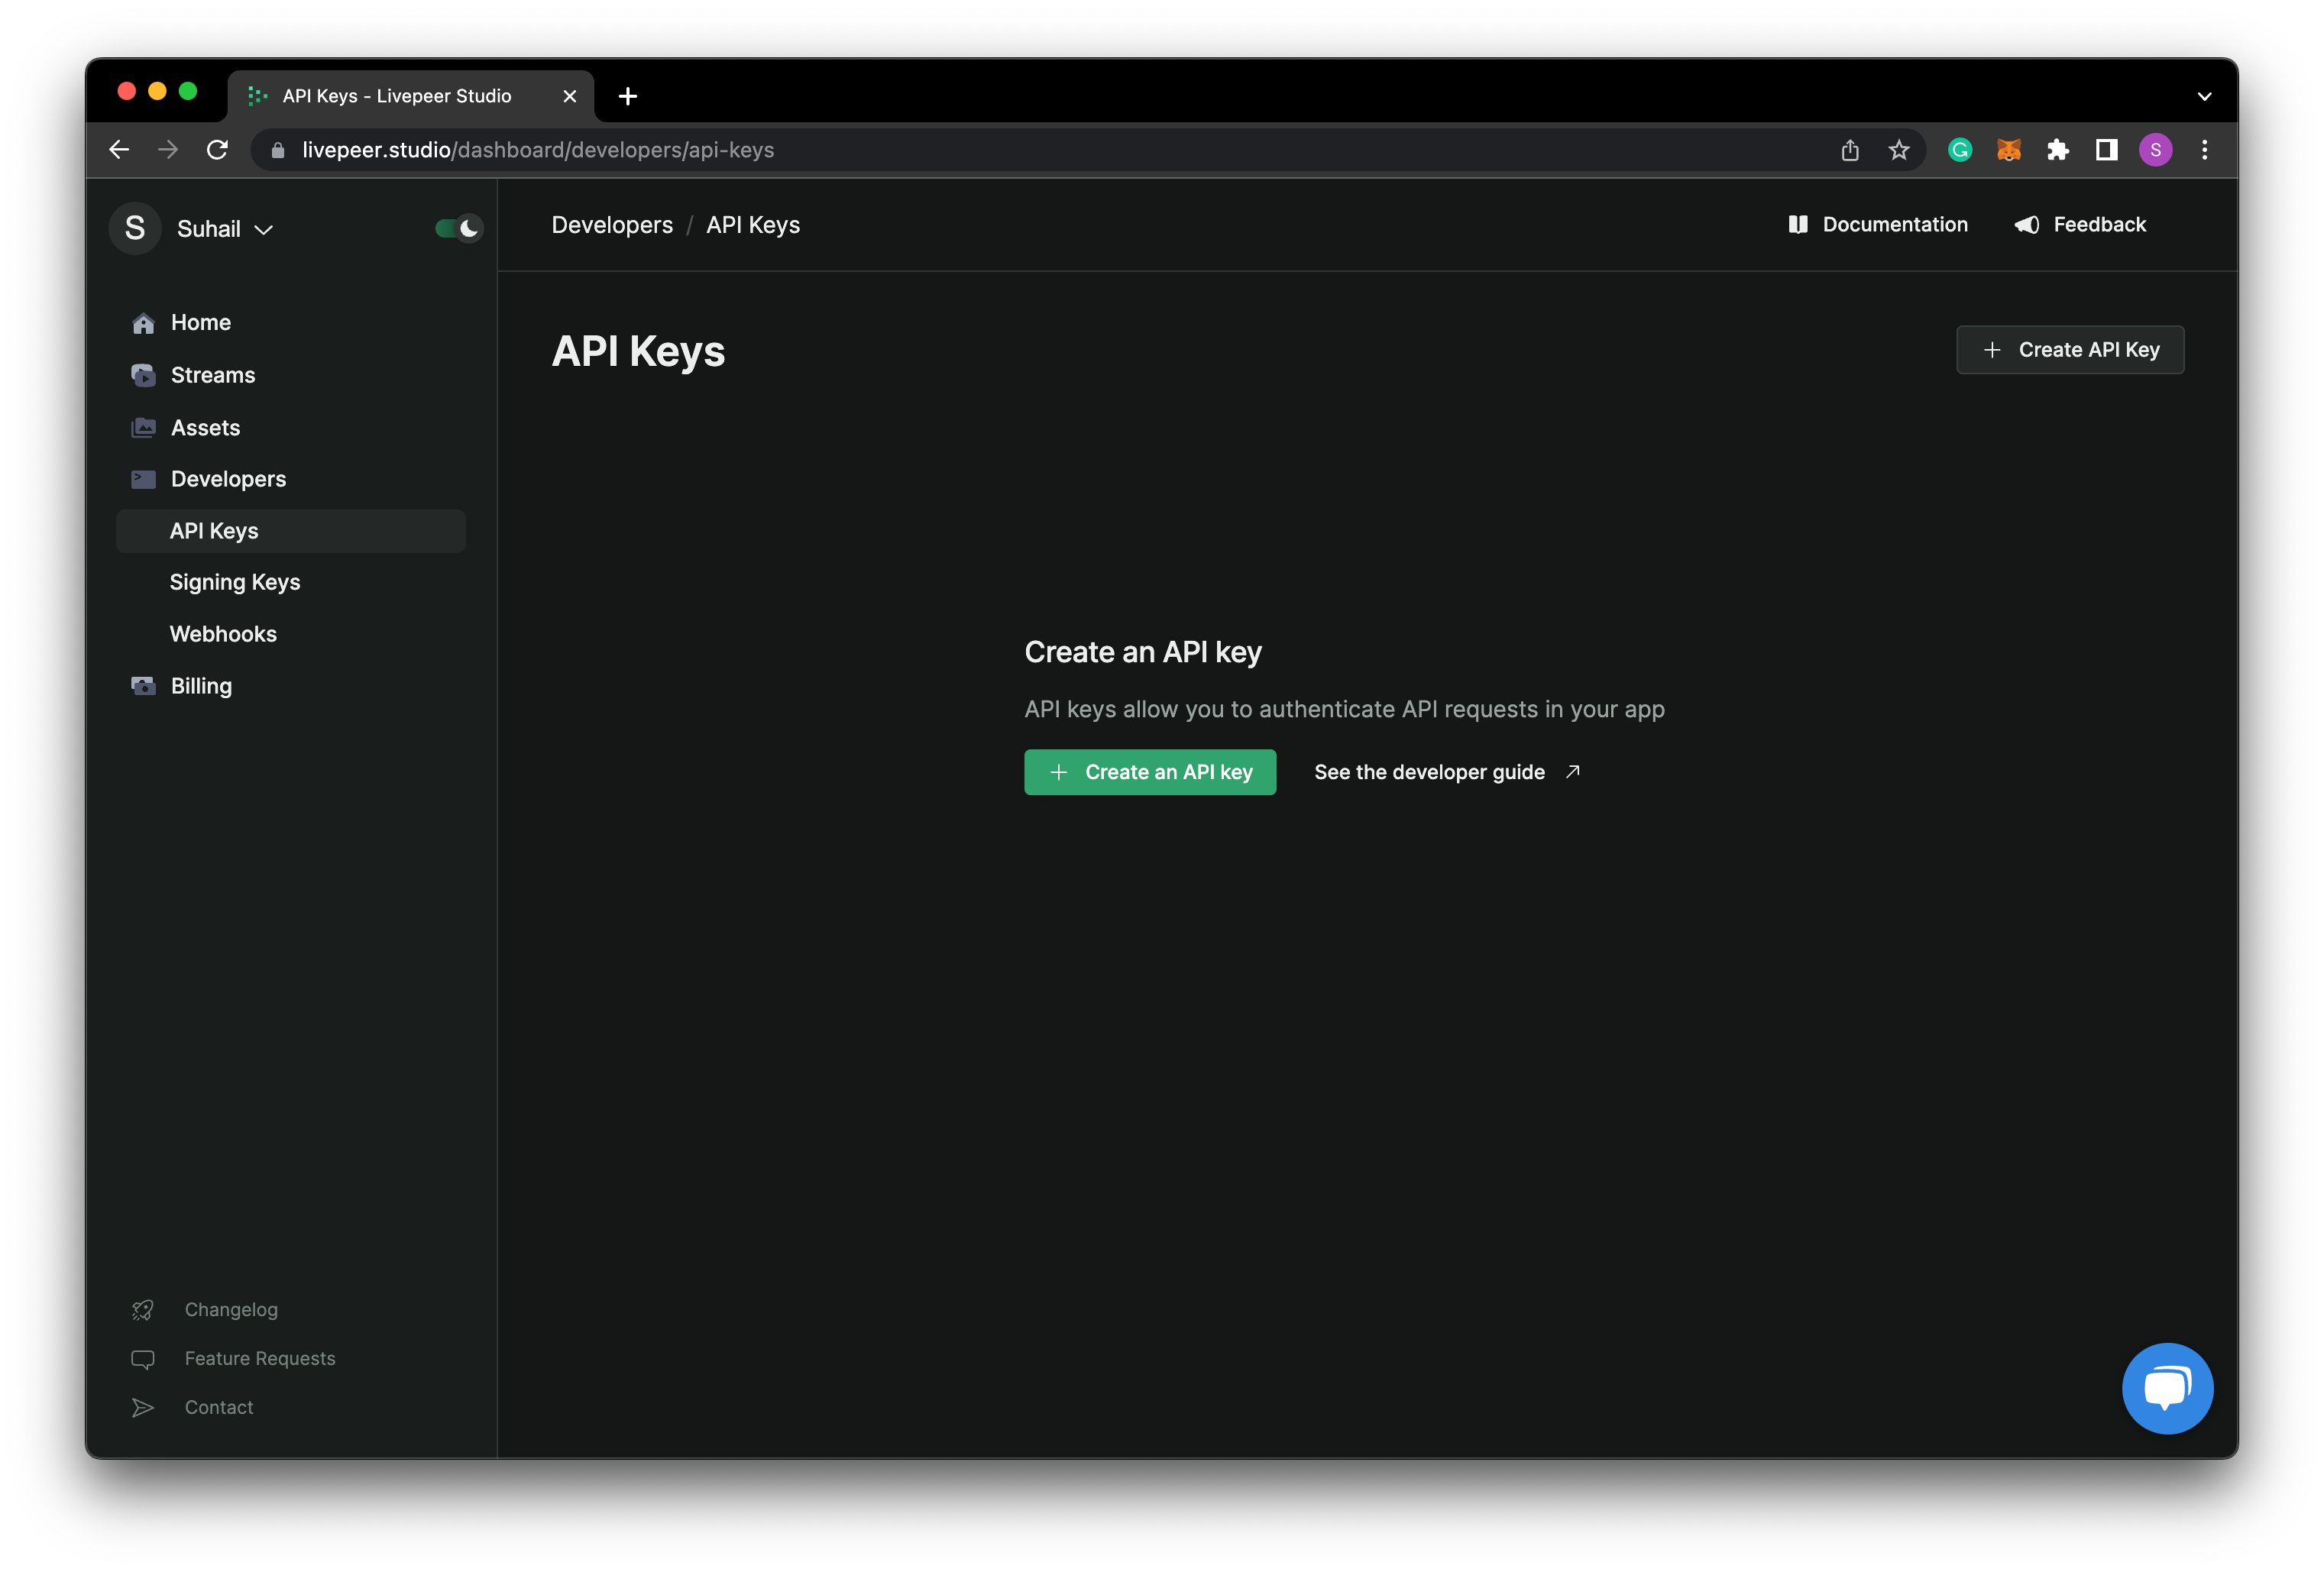
client in
the root directory, and add the following code to index.js
YOUR_API_KEY with the key which you just copied from
the Livepeer dashboard. And also replace the code inside of _app.js in the
page directory with the below code.
Lit Protocol
As mentioned above, we will be using Lit Protocol for token gating/access control in our application. First, create a new directory namedhooks and
inside of it, create a new file named useLit. This would be the file to handle
the connection with Lit’s node. Add the following code to it:
_app.js and also wrap the application
with LitProvider
Backend
The first step is to set up a background route that will handle the webhook and verify the token. Since we are using Next.js, we can simply use theapi
routes.
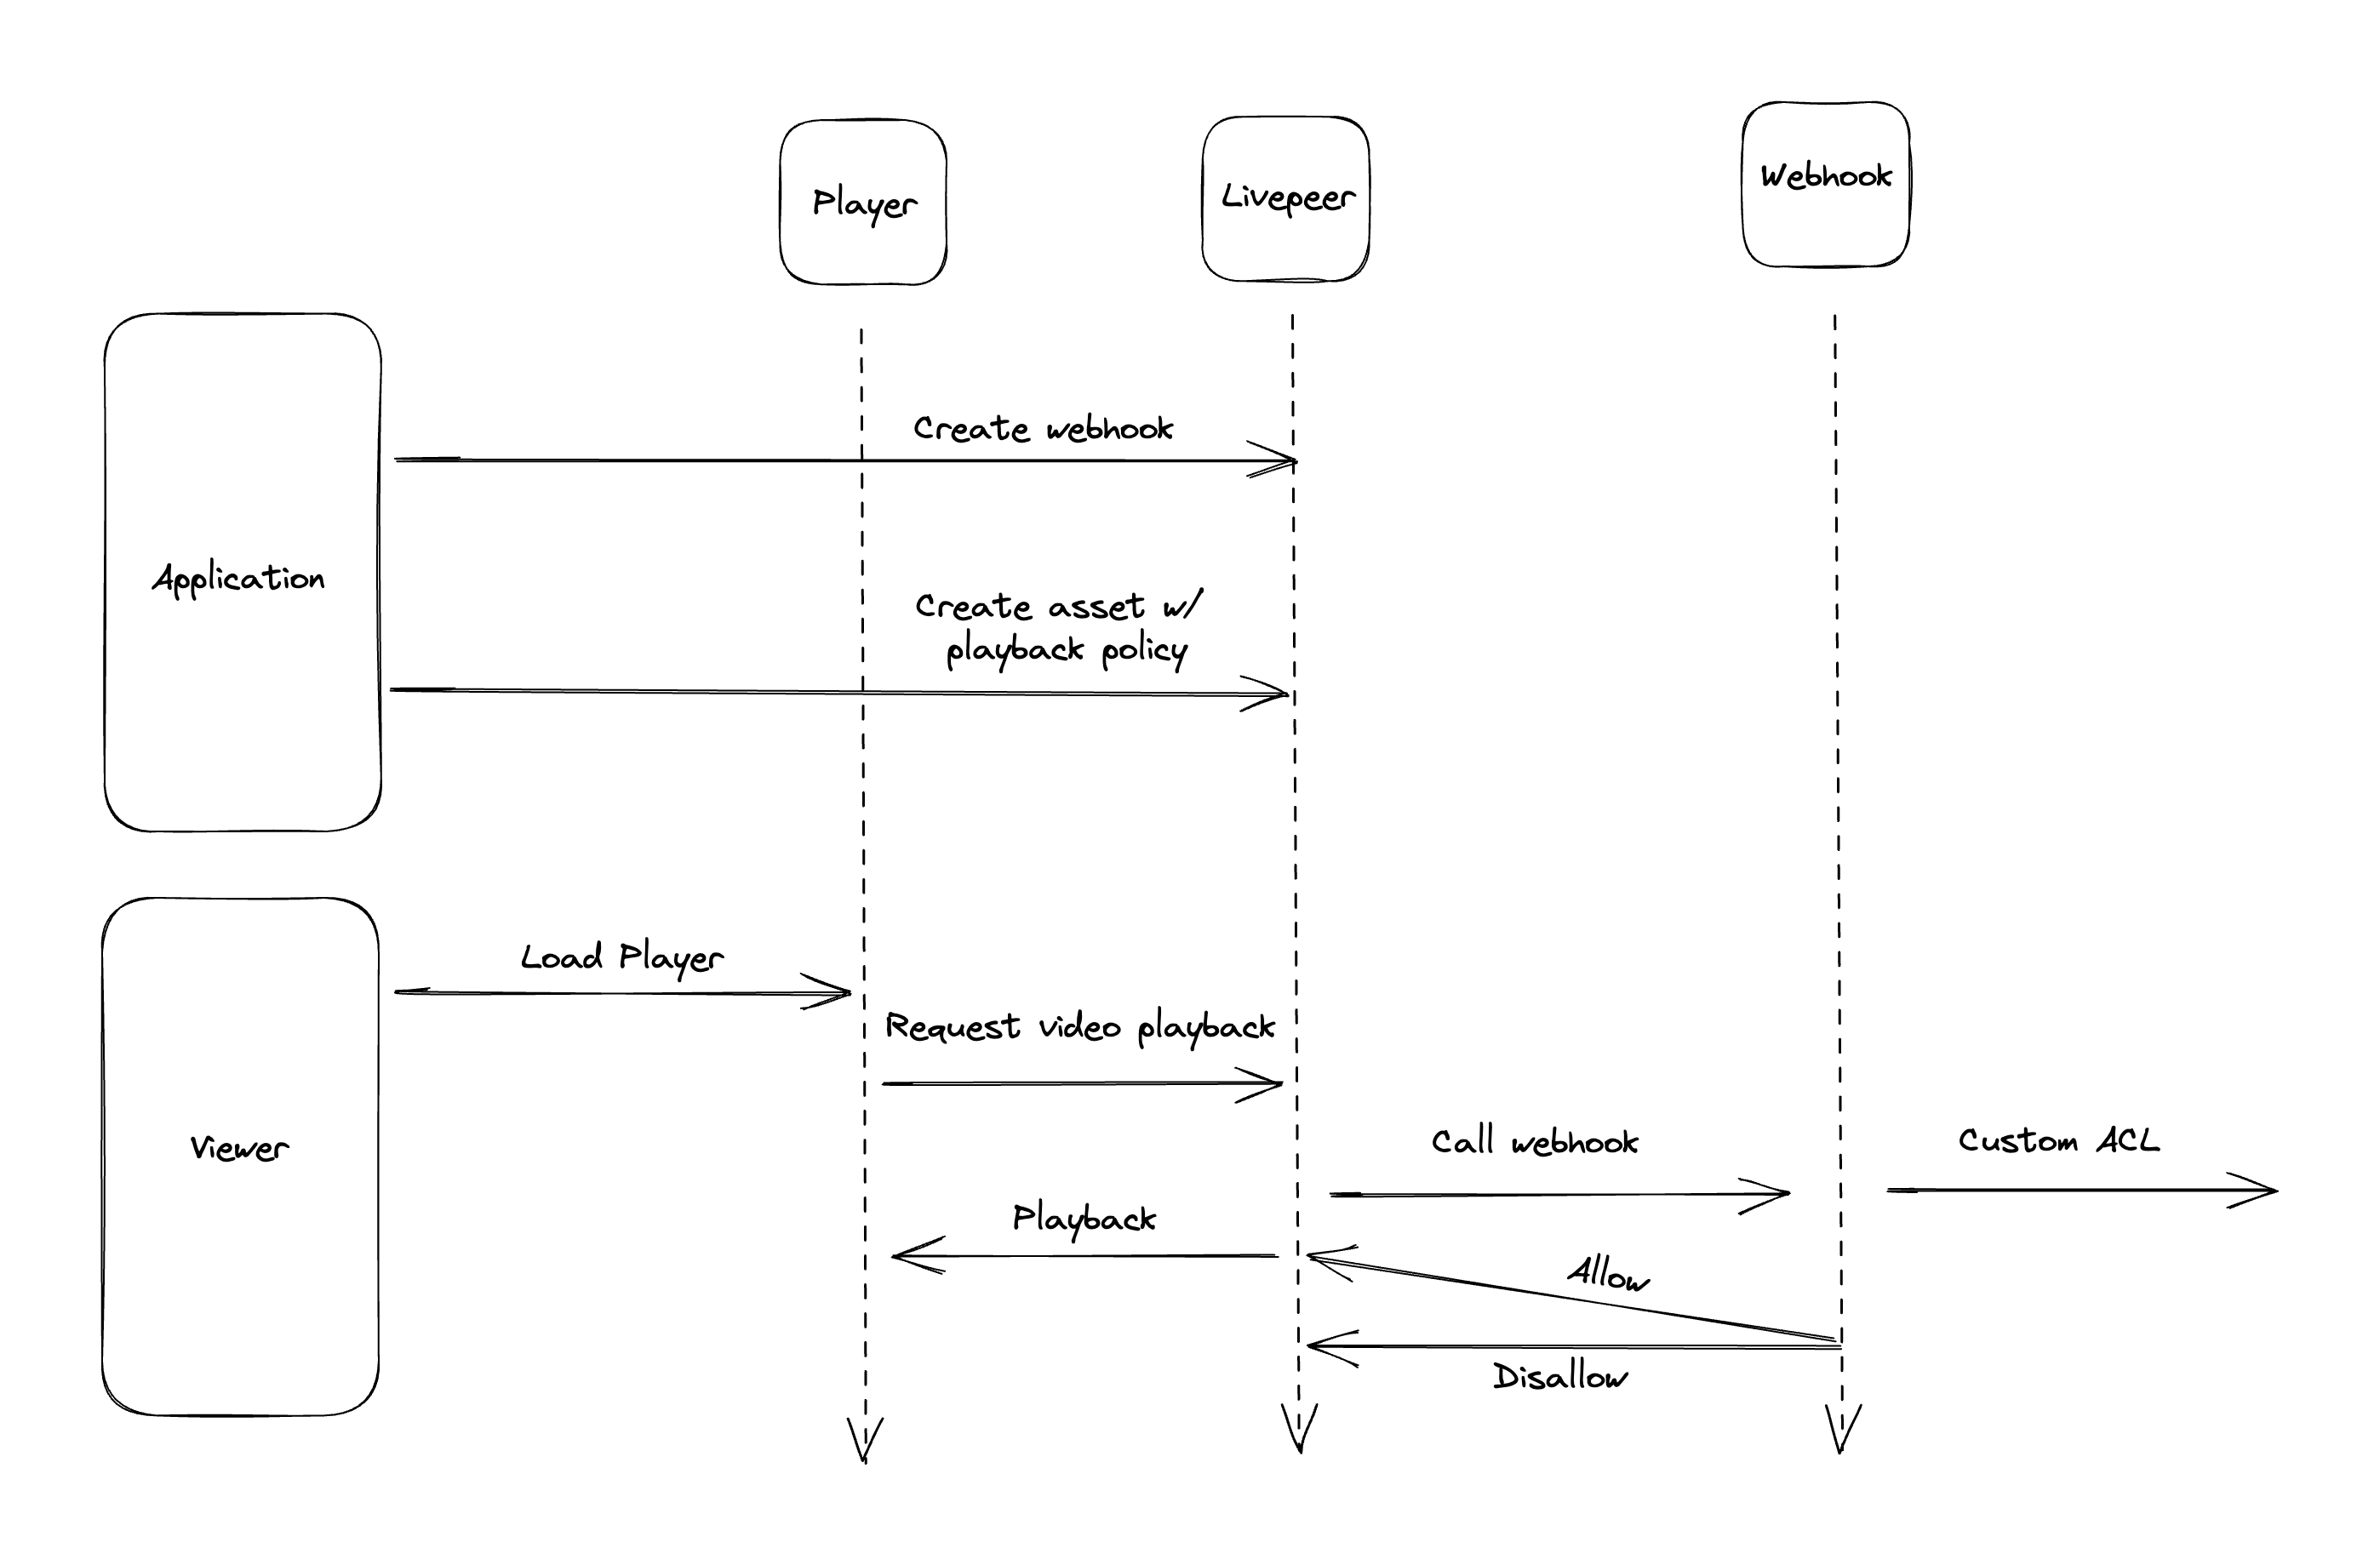
Create a Webhook Handler
The first step is to create an access control webhook handler. We need to set up an endpoint (e.g., https://yourdomain.com/api/check-access) to handle the logic for granting or denying access to your assets. This endpoint should accept a POST request with a JSON payload containing the access key and webhook context. This is an example of a payload this endpoint would receive:api directory, create a new file named verify-lit-jwt.js and
add the following code to it
baseUrl, path, orgId,
iat, and exp fields.
If the access token is not verified or if the resource ID does not match, an
HTTP response with a status code of 403 is returned. If everything is fine, the
handler returns an HTTP response with a status code of 200.
Next, deploy your Next.js app to Vercel or any other hosting provider as we will
need a link to the verify JWT API.
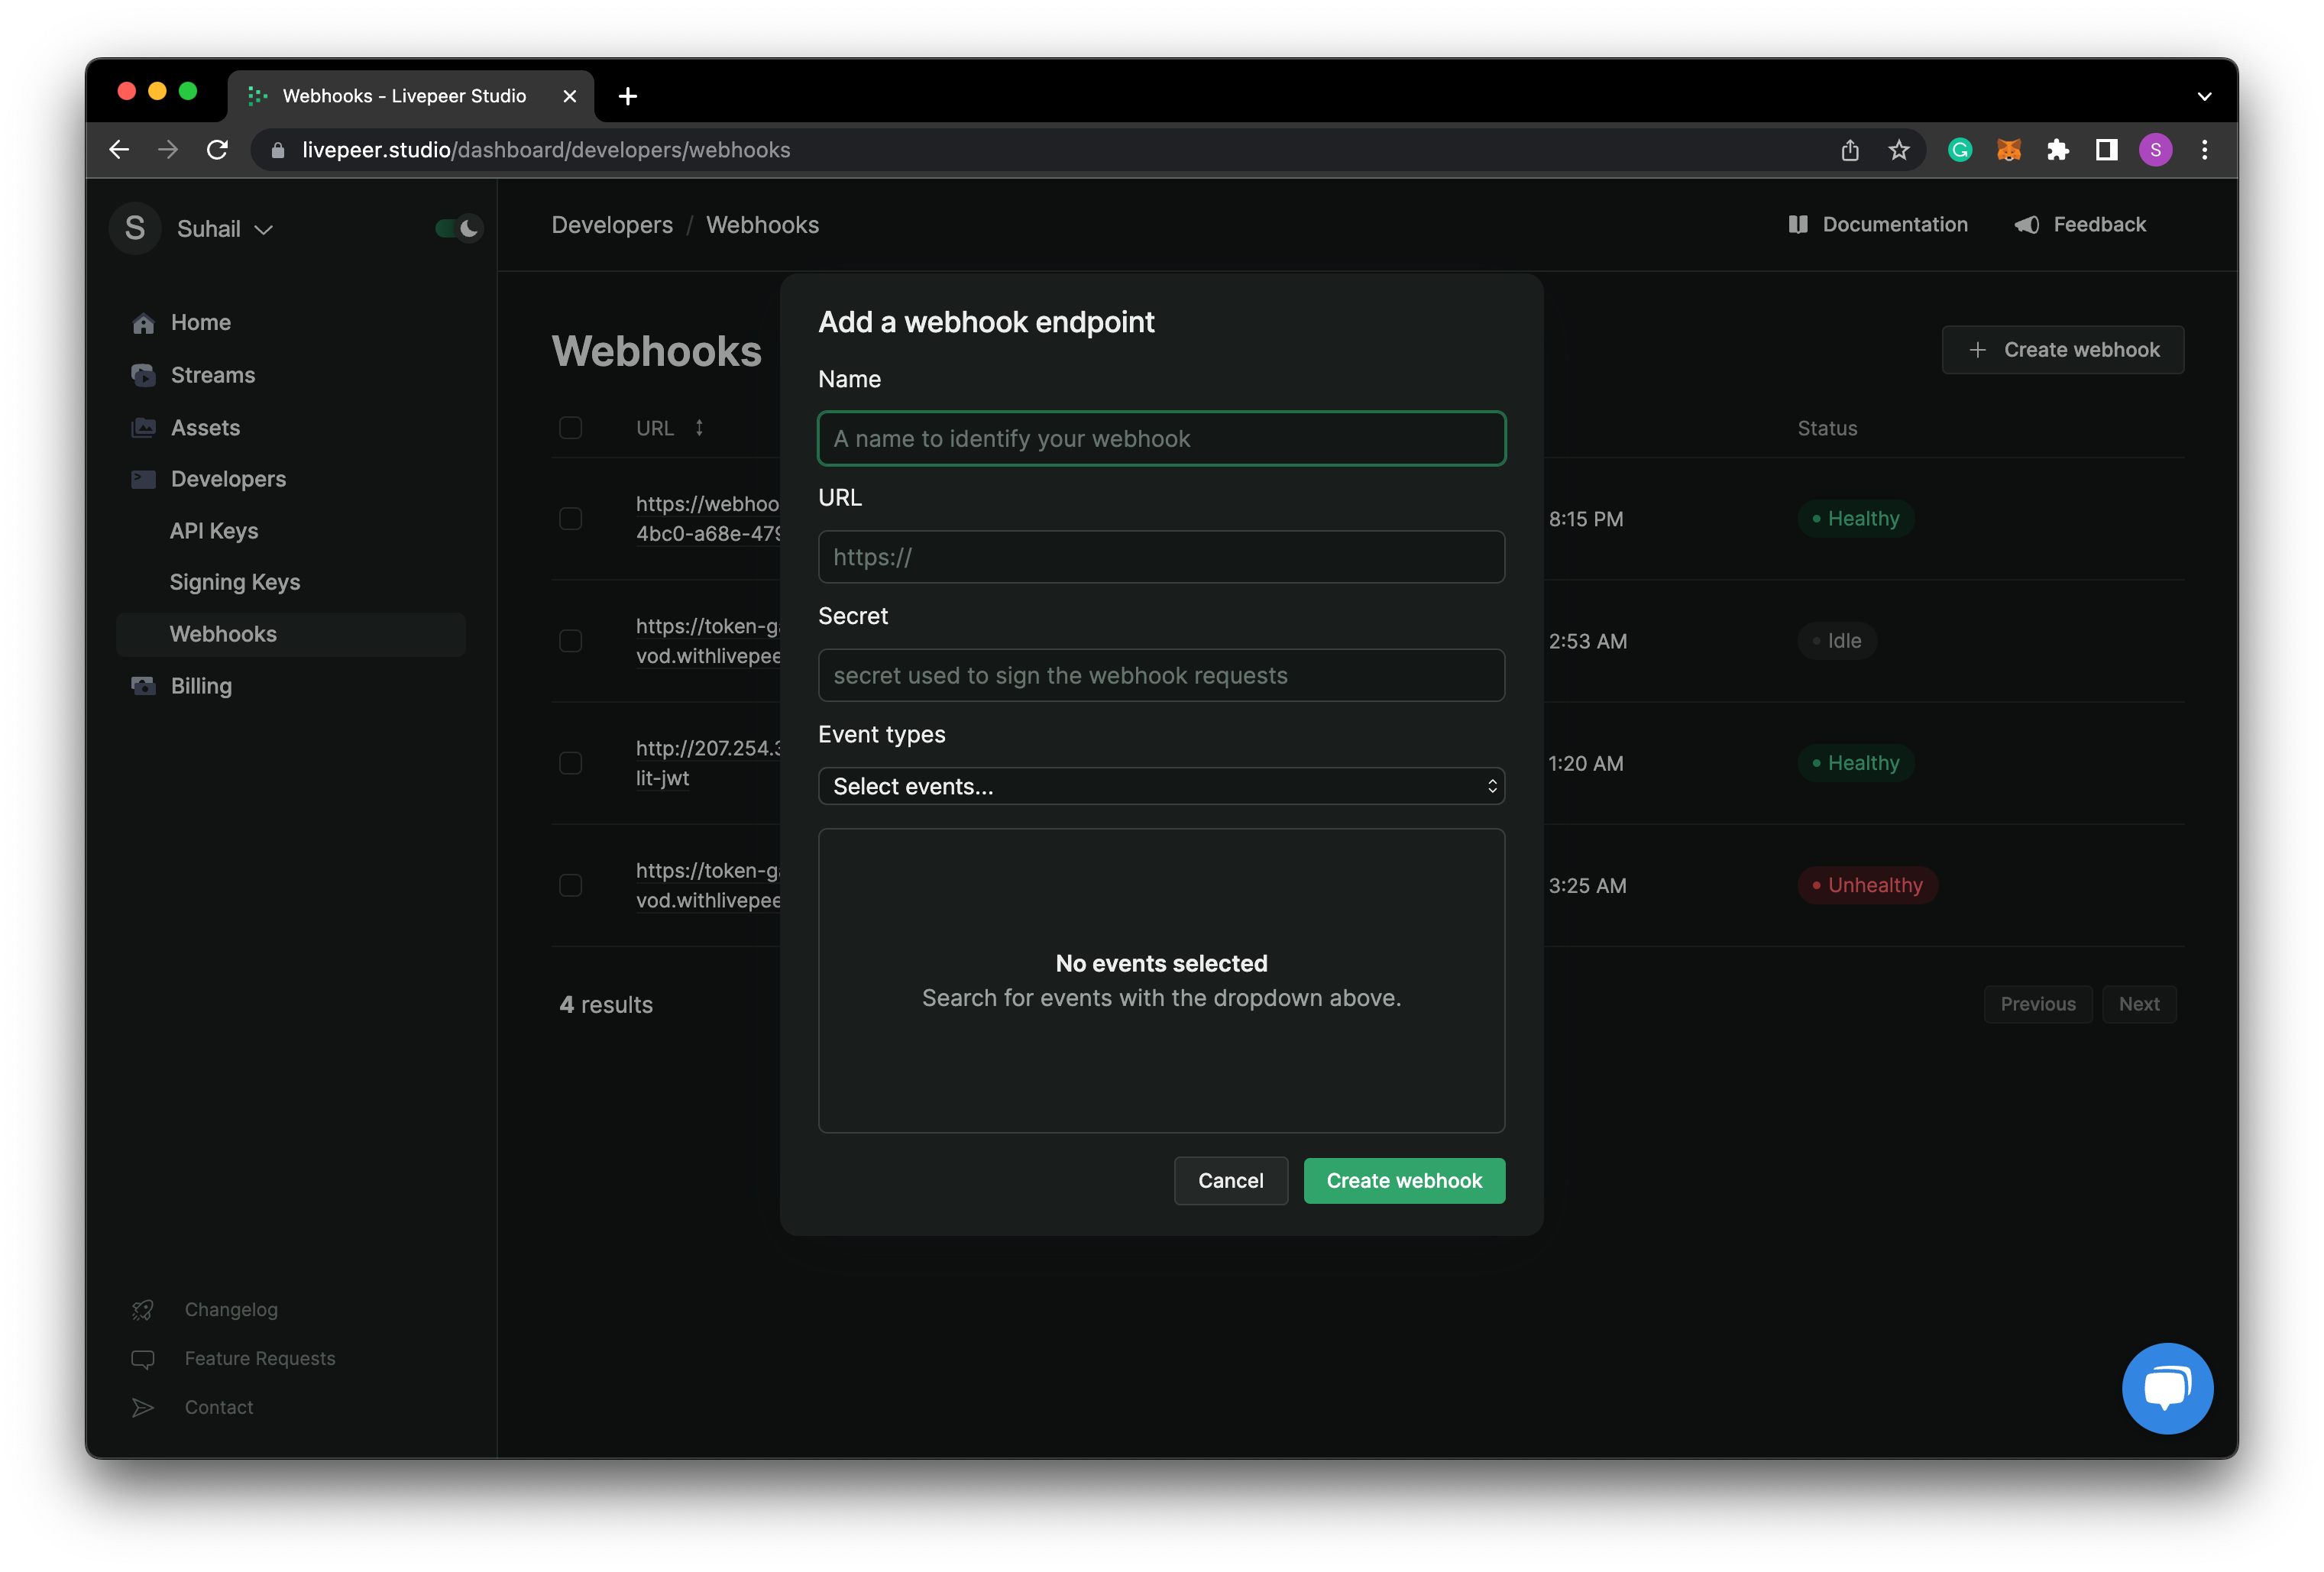
Register an Access Control Webhook
Once you deployed, you can use the Livepeer Studio dashboard to create a new webhook with the typeplayback.accessControl and specify the URL of your
access control endpoint.
Frontend
Now that we have set up the clients and backend, we can move to the front end and add the upload and access control features to our app.Wallet Connection
First, we need to allow users to connect their wallets. Create a new directory namedcomponents and inside of it, create a new file named Connect and add
the following code to it.
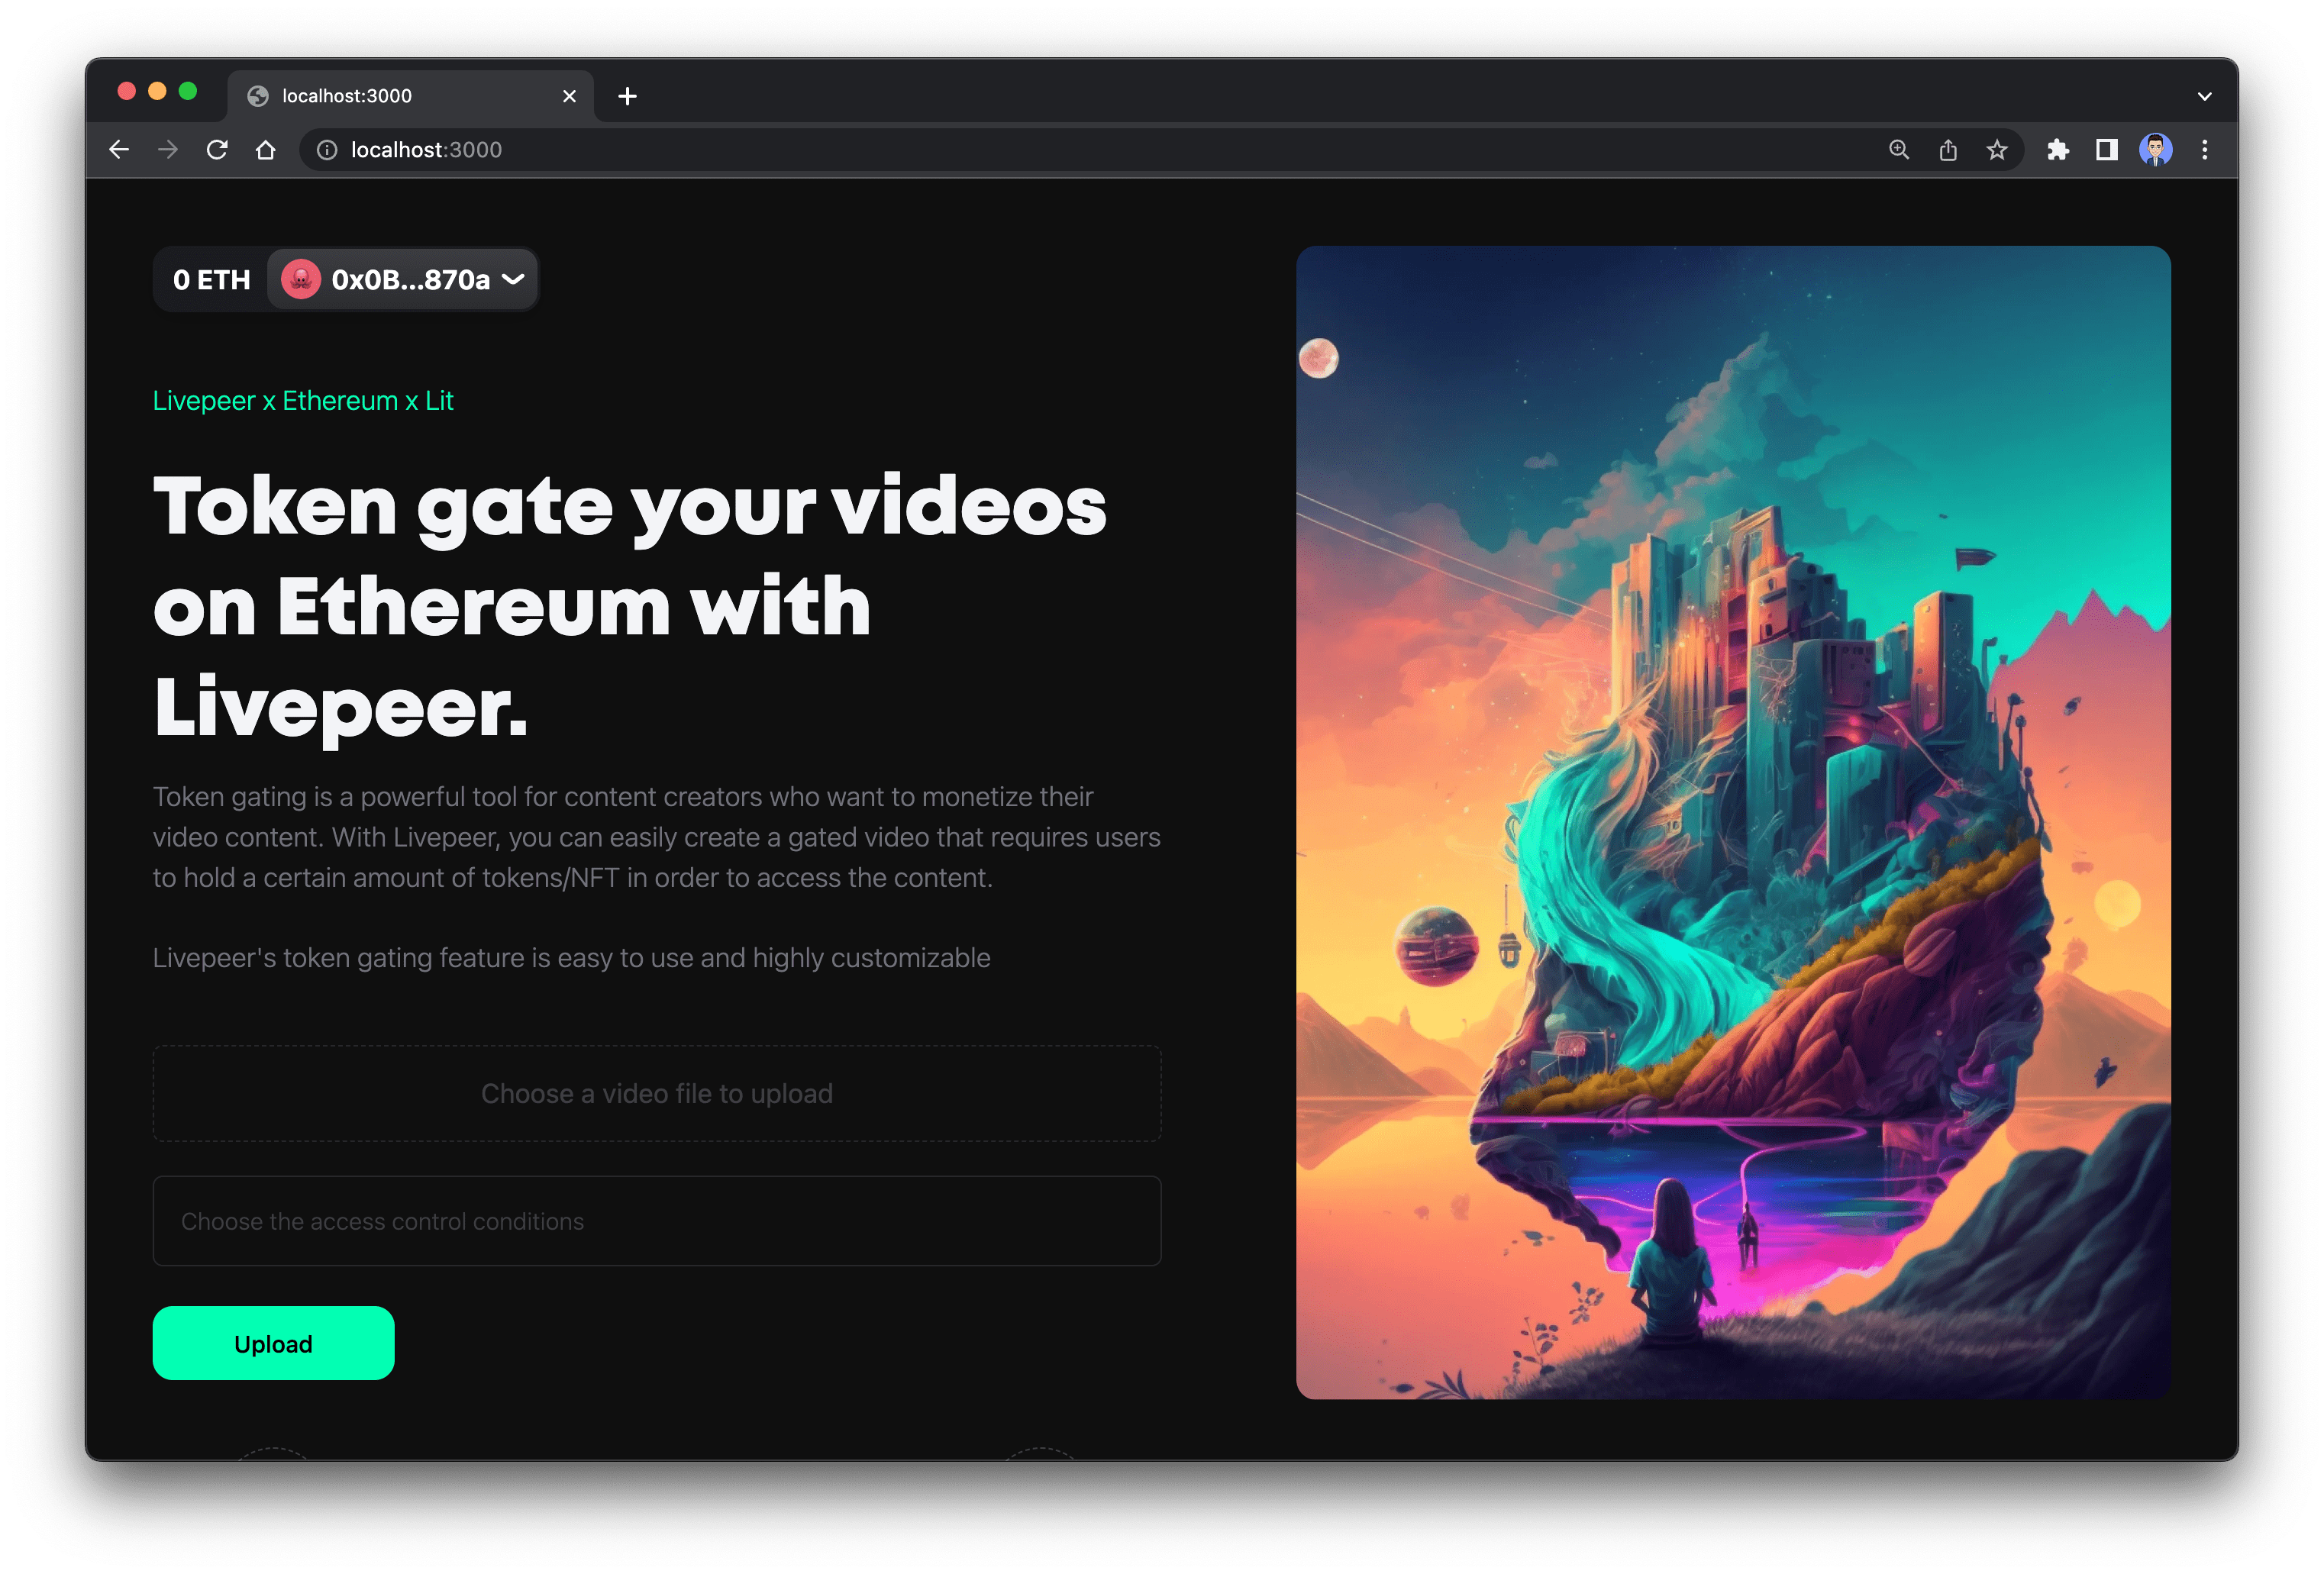
Upload page
In the pages directory, we can useindex.jsx as the upload page, or you can
also create a new file named upload.jsx for the upload page. In this tutorial,
we will be using index.jsx as the upload page and it will be the index page of
our app.
First import the following in the index.jsx file.
resourceId that will be used by Lit for
checking the access control.
useAccount hook that is imported from WAGMI.
AuthSign state.
Next, after signing the message, we can use useCreateAsset to upload the video
to Livepeer. In the below code, we also specify the webhook id, which we created
earlier. And useAsset hook to check if the asset upload/processing is
completed
Watch Page
For this watch page, you can create a new directory namedwatch inside the
page and then create a new file named [playbackId].tsx. This will tell Next.js
to match any link of /watch/anything to this page. Next, import the following
into the page.
usePlaybackInfo hook from @livepeer/react
useEffect function to get playback info and check
Lit access control when the component mounts.